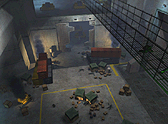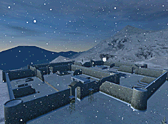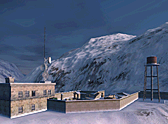

Mission 13, Nuclear Infiltration, drops you near the perimeter of a nuclear research plant that Ekk's soldiers have taken over. The route runs past a camera-watched warehouse, down a lift into an underground tunnel section, back up near a watchtower and on to the communications compound, where you must kill every guard so Anya and Harrison can land. The objective completes when the last compound guard is dead, and the mission ends after the closing cutscene.
Briefing
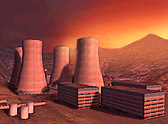
Anya explains that the site was a plutonium refining plant during the cold war and is now used for anti-missile weapon research, which is the link to Ekk. It still has a working nuclear reactor. The soldiers there wear the wrong uniforms and there are signs of recent gunfire. Anya tells Jones: "you must secure the inner compound surrounding the communication post." Once it is safe, Anya, Harrison and his men come in by chopper so Anya can get into the plant's computer network. It follows straight on from mission 12, where Ekk escaped by helicopter. The full story is in the IGI story and characters.
Objectives
The mission's objective text holds eight lines:
- Penetrate the perimeter.
- Secure deployment zone for Anya and friendly forces.
- Power on the Generator in the Generator building.
- Turn on the transformator in the large storage building.
- Open the doors for the weapons factory.
- Get trough the weapons factory.
- Get past the entrance to the cooling tower section without the alarm going off...
- Enter the Underground complex.
Only line 2 is used by the level script, so it is the one objective the map computer tracks, and its map marker points at the helipad. It completes once all fifteen guards posted in and around the communications compound are dead, and then one last guard who appears when you get close to the Communications Centre. Four seconds later the closing cutscene plays and the mission is done. The other seven lines are never checked.
Starting loadout
| Item | Ammo |
|---|---|
| M16A2 with M203 grenade launcher | 40 x 5.56 mm, 2 M203 grenades |
| Dragunov sniper rifle | 10 in the magazine + 10 spare |
| Glock | 17 x 9 mm |
| Knife, binoculars | - |
That is not much rifle ammo for a long mission. Almost every guard carries an AK-47, so plan on taking one early. See the weapons guide for how each gun handles.
What is in the level
- Enemies: 56 soldiers, nearly all Spetsnaz with AK-47s. Spetsnaz are tougher and more accurate than ordinary guards. In the compound one carries a Minimi at the heavy machine gun post, and a sniper sits up high by the fuel depot.
- Camera and alarm: the only security camera hangs in the large warehouse near the start. It sweeps a narrow arc and sees about 25 m. The alarm goes off if that camera spots you or if anyone presses the alarm switch in the same warehouse. When the alarm is on, the five guards in the two small barracks further in move onto alarm patrol routes.
- Towers: three guards stand on towers: one on the tall tower near the start, one on the watchtower beside the small warehouses after the tunnels, and one about 8 m up a tower inside the compound. The map computer labels all three "Watchtower".
- Two lifts link the surface and the tunnel section, about 27 m apart vertically. The large barracks has a third lift that only goes to its upper floor.
- Underground: 19 Spetsnaz in the tunnels and rooms. The map computer does not work down there.
Pickups, as the level data places them:
- Small garage past the large warehouse: 3 hand grenades and 3 M203 grenades.
- Small barracks on the way in: 20 rounds of 5.56 mm.
- Large barracks by the first lift: a medipack (50 health).
- Tunnels: a Jackhammer shotgun with 32 shells.
- Small barracks after the second lift: a medipack (50 health).
- Small warehouse next to the watchtower: 3 hand grenades and 3 flashbangs.
- Compound office building: two Uzi x 2 pickups.
Step-by-step route
1. The perimeter and the warehouse
Before you move, use the binoculars on the tall tower and the large warehouse. Take the tower guard with the Dragunov, then the four guards around the warehouse. Shoot from where the camera cannot see you, or shoot the camera itself: a destroyed camera stays off, but guards within about 25 m hear it blow up. Kill anyone heading for the alarm switch first. Anya's message "Locate the underground entrance" comes up in this area. Collect the grenades and M203 rounds from the small garage nearby, and an AK from a dead guard.
2. The barracks and the first lift
Head on to the pair of small barracks. Five guards are stationed here, with two more close by. Grab the 5.56 ammo, then deal with the three guards around the large barracks and take its medipack. The lift beside it goes down. Clear the lift's top landing before you call the lift, and expect a guard near the bottom.
3. The underground section
At the bottom Anya says "Proceed through the underground section." This is the longest fight in the mission: about 200 m of tunnels and rooms with 19 Spetsnaz, and no map computer. Pick up the Jackhammer and its 32 shells partway along the tunnels. It suits the short corners better than your rifles. Move one junction at a time, crouch at corners and let guards come to you. Ride the second lift at the far end back up.
4. Watchtower and small warehouses
At the top Anya says "Proceed to the communications section." Six guards cover this area, one of them on the watchtower. Snipe him first. Restock at the small warehouse (grenades, flashbangs) and the small barracks (medipack). The cooling towers stand between you and the compound.
5. The communications compound
When you reach the compound edge, Anya orders: "Secure compound. Eliminate all enemy guards." The compound holds the Communications Centre, the radar tower, the office, a garage, a fuel depot, the heavy machine gun post and the helipad. Fifteen guards are spread across it, several on raised spots. From cover outside, use the binoculars and take the sniper, the tower guard and the Minimi gunner first, then work through the rest. When you walk in close to the Communications Centre, one more guard appears there. Kill him to finish the objective, and the chopper brings in Anya and Harrison.
Tips for Hard
- On Hard, Spetsnaz take more hits to drop, aim better at long range and keep hunting a lost target for up to 30 s. Aim for the head: a head or heart hit kills from any gun.
- You also take 25% more damage, and health never regenerates. Save the two medipacks for after the tunnels and before the compound.
- Count your Dragunov rounds. You start with twenty (a full magazine and 10 spare), and the compound's sniper and gunner are better targets for them than anything at the start.
- Flashbangs and grenades thrown round a tunnel corner are safer than peeking.
- Keep the warehouse camera and its switch in mind the whole time you are near the start. An alarm sends the barracks guards out on patrol before you get there.
More general advice is in stealth and survival tips. The next mission is mission 14: Finding the bomb, and every mission is covered in the full walkthrough.
Play it
Project I.G.I. was made by Innerloop Studios and published by Eidos Interactive in 2000. playigi.com is the first and original browser port, made by Sachal, with optional HD textures by the Neonix Modding Team. You can play mission 13 in your browser once your profile reaches it.