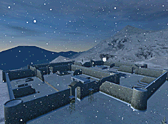

Eagle's Nest I has three jobs in a fixed order: take the sniper rifle from the roof of the large ruined house, switch the generator back on in the main compound's power building, then use the cable car controls at the winch house and step into the car. You never have to clear the whole fort.
Briefing
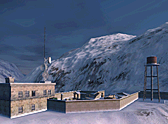
After defending Priboi in mission 10, Anya sends Jones after Ekk. Her camp is an old KGB redoubt in the ruins of a castle on a rocky outcrop, and the only way up is a cable car. The cable car starts inside a regular army training fort at the foot of the mountain. A chopper drops Jones some distance away, and one of Harrison's men has left a weapons cache for him. Anya's last line sets up the whole mission: "The cable car has it's own independent power supply." That supply is off, so you have to find the generator.
Objectives
- "Locate and retrieve the sniper rifle."
- "Power up the cable car by switching the generator back on."
- "Activate the cable car controls."
Objective 3 only counts once objective 2 is done. Pressing the controls early records nothing.
Starting loadout
- Knife
- Glock 17
- Desert Eagle with 32 extra rounds of .357 (the most you can carry)
- MP5 SD3 with 120 extra rounds of 9 mm
- One hand grenade
- Binoculars
There is no medipack in the loadout and none anywhere in the level, so every hit you take stays with you to the end. Use the MP5 SD3 for most of the work. The weapons guide has the full numbers for each gun.
What is in the level
The level has three guarded areas, plus your landing spot on high ground above them. There are 52 enemy soldiers in total. Most carry AK47s, and the security patrols carry SPAS 12 shotguns or Uzis. The level data has no guard spawners, so once a guard is dead he stays dead.
Ruined village (sniper rifle)
This is a cluster of ruined houses, brick huts and a water tower, about 220 m from where you land and well below you. It holds about 16 guards. The large ruined house ("Two storey building" on the map) is the key building. The Dragunov lies on its roof. Inside the house you also find a SPAS 12 with 7 shells and three hand grenades. The village has its own alarm, with two alarm buttons and two sirens (one on the large house, one by the brick huts), but no cameras. On the way down to the fort, three more guards stand at the two electricity pylons.
Main compound (generator)
This is the training fort itself, roughly half a kilometre further on and far lower down. It is the biggest area, with about 25 guards, nine watchtowers (six small and three large), a bunker, a fortified gun post ("Heavy machine gun post" on the map), a security post ("Checkpoint"), a Guard HQ, a small barracks ("Barracks"), a Small Garage, a Large Warehouse and an unloading platform ("Shelter"). Five security cameras and three alarm buttons are tied to its alarm. Useful buildings:
- Power Building: holds the generator console for objective 2.
- Ammunition Storage: an M16 A2, three single M203 rounds, four hand grenades and two computer terminals: one switches off the cameras, the other opens an inner door.
- Guard HQ: two Uzi x 2 pickups with 32 rounds of 9 mm, three mounted M2HB machine guns and a lift.
- Checkpoint (security post): 20 rounds of 5.56.
Winch compound (cable car)
This is a smaller yard about 280 m beyond the power building and a little higher up. It has the winch house with the cable car, a Large Warehouse, a small barracks (with 8 shotgun shells), an office building with a second terminal, and a security post. It holds around 8 guards, two cameras and three alarm buttons.
Step-by-step route
- Scout from the landing spot. You start above the ruined village. Open the binoculars (B) and mark the guards before you move. The map computer (M) shows soldiers at its two middle zoom levels (not the widest or the closest) and labels each building.
- Clear the village quietly. Work around the edges with the MP5 SD3 and take out lone patrols first. Watch the two alarm buttons on the far (east) side of the village, by the ruined houses and the water tower, about 50-60 m from the large ruined house. A guard who reaches one will raise the village alarm.
- Take the sniper rifle. Find the way up to the roof of the large ruined house and walk over the Dragunov. Objective 1 completes at once, and Anya tells you to head down to the main compound. Grab the SPAS 12, the shells and the grenades from the house too.
- Snipe the main compound. Approach from high ground and use the Dragunov on the watchtower guards first. In the port's weapon data the Dragunov has the same short noise range as the silenced MP5.
- Kill the cameras. Either shoot them from outside their view, or reach the terminal in Ammunition Storage and hold Activate (E) for 4 seconds. Hacking it takes all seven cameras in the level offline for two minutes. An on-screen message says the cameras are offline for 2 minutes, then another says 1 minute.
- Start the generator. Enter the Power Building and use the console. Objective 2 completes, and she sends you up to the winch house.
- Clear the winch compound. If the cameras are back on, the office building has a second terminal that switches them off for two minutes again. Deal with the guards around the winch house and the small barracks.
- Use the cable car controls, then board. Press the controls (objective 3) and step into the cable car. The outro plays and the car carries you up to Eagle's Nest II.
Tips for Hard
- On Hard you take 25 % more damage, and regular guards can take three AK47 hits to the body. A head or heart hit still kills with any gun, so aim high with the MP5.
- Hard guards always fire after a short half-second delay, with no random extra wait, and are far more accurate at long range. Avoid long open slopes in their view, and use the Dragunov from as far away as you can.
- With no medipack in the level, treat your health as your limit for the whole run. Retreat and let guards come to you around a corner instead of pushing through doors.
- A camera needs about three seconds of looking at you to detect you, but it spots a dead body at once. Do not leave bodies inside camera views, or hack the terminal first.
- Kill guards before they reach an alarm button. The ones near the buttons are the first targets in each area.
For more general advice, read the stealth and survival tips, or go back to the full walkthrough of all 14 missions.
Play it now
Eagle's Nest I runs in the browser at playigi.com, the first and original browser port of Project I.G.I. (Innerloop Studios, published by Eidos Interactive in 2000), with optional HD textures by the Neonix Modding Team. Start the game and take the cable car up to Ekk's fortress.