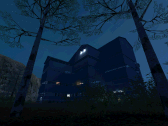

The level editor for IGI 2: Covert Strike is igi2ed.exe, Innerloop's own tool (called QED inside the program). The Neonix Modding Team offers it as the "I.G.I. 2 Editor (igi2ed)" SDK, version 1.1, on Nexus Mods. You start it with a level number, fly around with Alt and the mouse, move objects with Shift and the left mouse button, save with Ctrl+S and play the level inside the editor with F3. This guide covers installing it, those basics, lightmaps and testing, based on the SDK's own docs folder and on testing the stock editor.
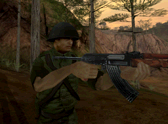
level31 opens it in the editor.What the editor is
The editor opens one level per run and shows it in a 3D view, with the task tree on the left and a parameter window for the selected task. A level is a tree of tasks: a task is any one thing in the level, visible or not, such as a building, a door, a light, the terrain, an enemy soldier or a timer. Each task has a type, settings called parameters, and children below it in the tree.
With the editor you can change any stock level, build your own single-player and multiplayer levels from the demo level template, and use the same task types Innerloop used. The editor itself does not make 3D models, textures or sounds. The SDK includes tools to convert 3DS Max .max models into IGI 2's .mef/.mex format; textures and sounds need other tools. See the IGI mods guide for the wider picture.
Download the editor SDK
You need your own copy of IGI 2 (the Neonix patch needs version 1.3). The editor is a separate download:
- I.G.I. 2 Editor (igi2ed) on Nexus Mods: version 1.1, uploaded 24 August 2023 by xaeroneo for the Neonix Modding Team.
Nexus Mods needs a free account before it lets you download files.
The download contains these folders:
demodata: demo models and the tools to convert 3DS Max.maxfiles into.mef/.mex.docs: readme files.editor: the editor's resource files.missions: a basic demo level template.qed: the editor's key bindings (qedkeybindings.txt), cursor and fonts.tools:igi2ed.exe,editor.batand the other tools and DLLs.
Installing it
These are the install steps from the Nexus page:
- Unpack the
pcfolder into a folder of your choice. - Copy your whole IGI 2 game directory into that folder.
- Copy the
qedfolder and paste it outside thepcfolder. - Run
editor.batfrom inside thetoolsfolder.
To open a different mission, edit editor.bat: each mission has its own ID (see the table below). More documentation is in the docs folder.
The editor needs DirectX 8.1 or newer. Only one copy of the editor or the game can run at a time, so close IGI 2 before you start it. If you see "InnerloopGame is already running.", close the game or the other editor (check the Task Manager for a hidden one).
Back up first
The editor writes straight into the game files it uses, and some of what it overwrites cannot be got back without a copy. Working in a copied game directory, as the install steps do, already keeps your normal game safe. Before you work on one level, also copy just that level's folder, for example missions\multiplayer\demo.
To restore, move the damaged level folder out of missions and copy the saved one back in its place.
Starting the editor
The editor must run with the game folder as its working directory, which editor.bat takes care of. Out of the box it opens the demo map, mission ID 100. It starts fullscreen, and in fullscreen the editor crashes when you switch back to it with Alt+Tab, so run it in a window: copy editor.bat, open the copy in Notepad and add the word Window after the level number on the line that starts igi2ed.exe, so it ends like this:
igi2ed.exe level100 WindowThe window uses the resolution set by GOGfxDisp(width, height, depth) in the game's config.qsc.
The number after level is the mission ID. To open another level, quit and start the editor again with the other ID.
| Levels | Mission IDs |
|---|---|
| Demo map (a readable copy of Redstone) | 100 |
| Multiplayer: redstone, forestraid, sandstorm, timberland, chinesetemple, jungle | 1, 2, 3, 4, 5, 8 |
| Campaign 1 (location 1) | 11 to 17 |
| Campaign 2 (location 2) | 21 to 26 |
| Campaign 3 (location 3) | 31 to 36 |
The demo level is the only level that comes with its readable objects.qsc, which makes it the best place to learn.
Moving the camera
Everything starts with Alt. While you hold Alt, moving the mouse turns the camera, and the other camera keys only work while Alt is held.
- Alt + mouse: look around.
- Alt+Shift / Alt+Ctrl: fly forward / backward. The longer you hold them, the faster you go.
- Alt+Left / Alt+Right: move sideways.
- Alt + left-click on an object: orbit around it while the button is held.
- F11: aim the camera at the task selected in the tree.
- Alt+F11: drop the camera onto the ground.
Selecting and moving objects
- Click a task in the tree, then press Enter to open its parameters. Esc leaves the parameter window.
- Right-click an object in the 3D view: selects it in the tree and opens its parameter window.
- Shift + left-drag: moves the object in the horizontal plane, so its height stays the same.
- Ctrl + left-drag: moves it in an upright plane facing the camera, to raise or lower it.
- Hold S and left-click: drops the object onto the ground below it.
- Hold G and drag left/right: turns it around the vertical axis (A and B turn the other two axes).
- Insert: opens the list of task types; the new task becomes the last child of the selected task.
- Ctrl+C / Ctrl+Shift+C / Ctrl+V: copy a task, copy it with its children, paste.
- Delete: removes the task and everything under it.
When you move an object, its children move with it: a building's furniture follows the building. Ctrl+Z undoes object moves, but a deleted task cannot be brought back except by quitting without saving. Innerloop's own 2003 guide warns about this.
Saving
Ctrl+S opens "Save level:" with the level's object file filled in. Read the path, then press Enter; the editor reports "Object file saved". It writes the task tree to objects.qsc in the level folder, and also the terrain and object lightmaps when they changed.
The game reads the compiled objects.qvm. The editor rebuilds it the next time it loads the level, so reload the level in the editor after you save. If your changes do not show in the game, check that objects.qvm is newer than objects.qsc.
If a save fails ("Failed to write to file ..."), the tree is still in temptask.txt in the game folder. After a crash, the editor writes crashobjects.qsc there. Both are plain text in the same format as objects.qsc. The editor's autosave is off by default, so save often.
Lightmaps
Lightmaps are light and shadow calculated once and stored, so the game does not have to work them out while you play. There are two kinds:
- Terrain lightmaps: select the Terrain task, open its parameters and press "Calculate lightmaps". To cancel, hold Ctrl+Shift+C. When it finishes, save with Ctrl+S, or the bake is lost.
- Object lightmaps: controlled by LightmapInfo tasks, mostly found under buildings. "Calculate lightmaps" bakes every object under that LightmapInfo, "Update lightmaps" only those that are missing or out of date; the buttons ending in "and save" do the same for the whole level and then save.
The bake needs a sun (a Dirlight task) and a GlobalLight task. "Calculate preview lightmaps" is a quick version without shadows, and it can look quite different from the real bake.
Be ready to wait: on the demo level the terrain bake can take around an hour and a half, and the object lightmaps several hours, depending on your PC. Under dgVoodoo with forced antialiasing, the terrain bake comes out flat and unlit.
Testing your map with F3
F3 saves the tree to a temporary file and loads the level in game mode inside the editor. F3 again brings you back, and whatever happened during play (doors opened, objects destroyed) does not end up in your level.
F3 does not create a player. Single-player levels have a HumanPlayer task, so F3 puts you in the player's shoes. Multiplayer maps, including the demo, do not: after F3 the view stays under the map. That is normal behaviour. Test features on a single-player level, or add a HumanPlayer with a HumanPlayerInput child for testing and delete them before you release the map. To play a finished multiplayer map with others, see the IGI 2 multiplayer guide.
The editor on a modern PC
The editor was made for 2003 computers. On a modern PC, clicks land beside the object you aimed at on widescreen displays (it assumes a 4:3 screen), number sliders run away to absurd values, text is tiny on high-resolution screens and fullscreen crashes on Alt+Tab. Run the editor at a 4:3 resolution, run it in a window and drag sliders very gently.
The Neonix Modding Team's version 1.4, now in development, lists upgrades to the IGI2Ed tools: a scalable interface, autosaves, undo, in-editor docs and faster lightmap baking. It is not out yet; follow neonixmods.com and the Neonix IGI 2 patch guide for news.
Tips
- Learn on the demo map (level 100), and keep its backup.
- For a new multiplayer map, copy the whole
missions\multiplayer\demofolder to a new folder undermissions\multiplayer. In the newmission.qsc, set a new unused mission ID above 100, your own name and description, "Mission directory" and "Mission models directory" to the new folder, and "Mission models resource name" to the folder name. Then start the editor withlevel<newID> Window. If the new map fails to load, check the demo's resource file names (demo.mtp,demo.dat,models\demo.res,textures\demo.res). - Do not leave a HumanPlayer in a multiplayer map.
- Keep the editor's console (F10) in view: warnings and script errors show up there.
- Give a task an ID (Ctrl+I) before a script refers to it.
IGI 2: Covert Strike is by Innerloop Studios and Codemasters (2003). The editor SDK on Nexus Mods is from the Neonix Modding Team, uploaded by xaeroneo. More guides are in the guides section.